
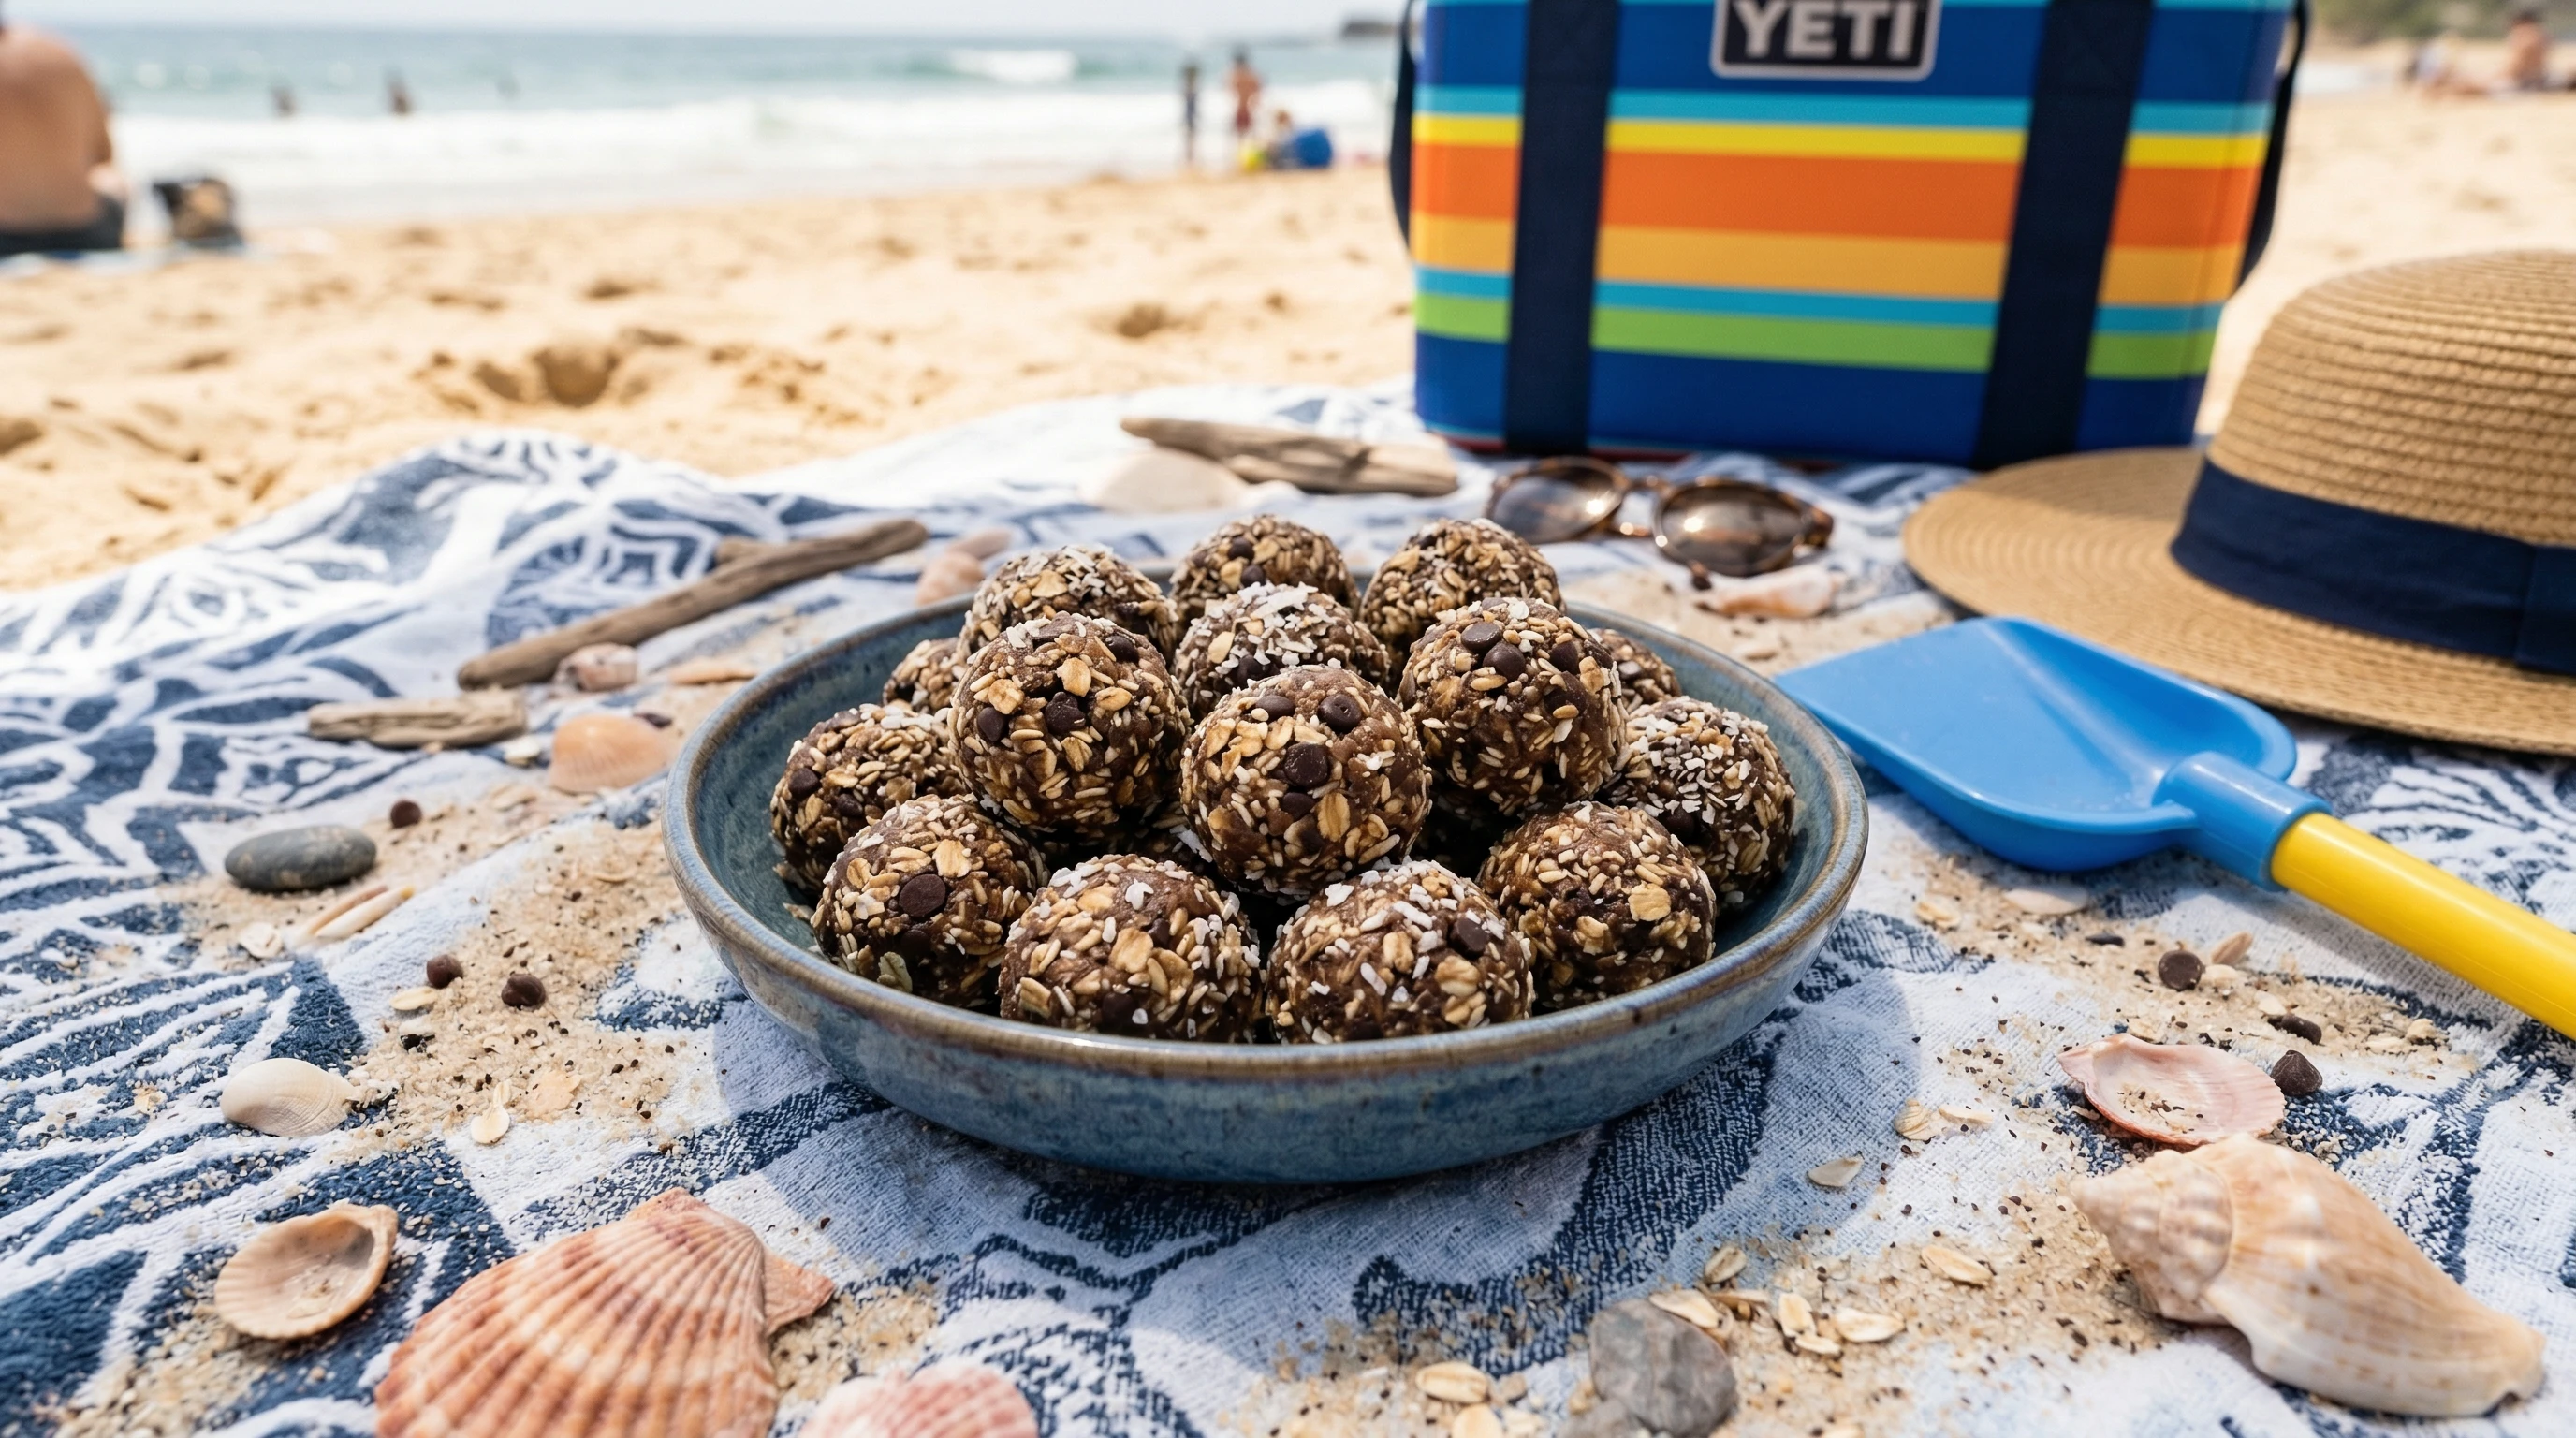
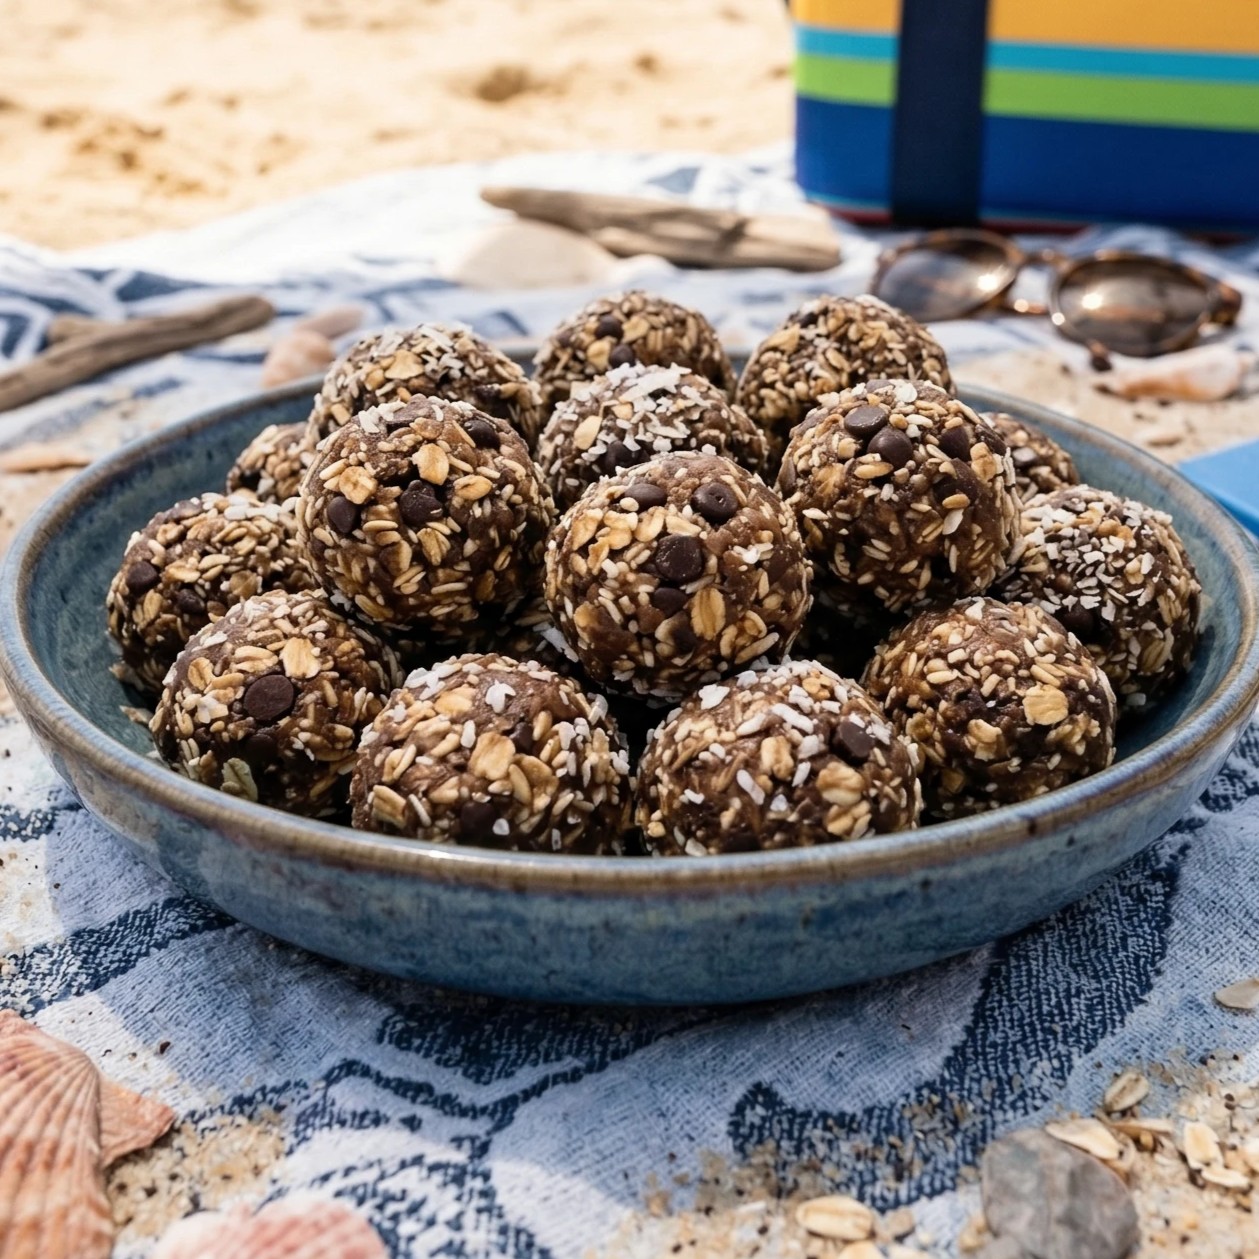
No Bake Beach Energy Bites. Snack Power For Your Next Beach Day
Easy, no oven recipes are pretty much a go-to for family beach days. These No Bake Beach Energy Bites fit perfectly into your snack bag menu being they’re quick to make, hold up well on a warm day, and kids can’t get enough of them. The mix of oats, peanut butter, honey, and a sprinkle of raisins (or chocolate chips if that’s more your speed) keeps these bites just sweet enough without being over the top.
Making snacks you know are packed with real ingredients always feels satisfying. This recipe is short and sweet, plus cleanup is quick. A batch the night before means the morning of your day starts out stress-free, and everyone has something to nibble on between beach games and sandcastle building.
Why No Bake Beach Energy Bites Work So Well
- No oven or stove needed. You can throw these together with just a mixing bowl and a spoon.
- Beach ready and fuss free. They’re sturdy enough for packing in a cooler and don’t melt like regular chocolate bars.
- Sweet, chewy, and kid approved. My toddlers love these just as much as the older kids. They’re easy for little hands to grab between play sessions.
- Customizable with simple swaps. Go for raisins for a classic touch, or use mini chocolate chips for an extra treat. Add ins like shredded coconut or sunflower seeds work, too.
Ingredients
Here’s what you’ll need to whip them up:
- 1 cup rolled oats
- 1/2 cup peanut butter (smooth or chunky both work)
- 1/3 cup honey
- 1/4 cup raisins or mini chocolate chips
- 1/2 teaspoon vanilla extract
Step by Step: How to Make No Bake Energy Bites
1. Get Your Base Ready
Pour the rolled oats into a large mixing bowl. I use rolled oats for the best chewy bite; you can pulse them a bit in a food processor if your kids prefer a less chunky texture.
2. Mix Wet Ingredients
Measure out the peanut butter and honey, then add both to the bowl. Toss in the vanilla extract, too. Just a splash brings out the flavors.
3. Stir Until Blended
Mix everything up with a spatula or big spoon. It’ll look a bit stiff at first, but keep going until it all comes together and the oats are well coated with the gooey mix.
4. Add Raisins or Mini Chocolate Chips
Once the main mixture is sticky and uniform, fold in the raisins or chocolate chips. Stir gently so they’re evenly spread throughout, but aren’t crushed.
5. Shape Into Bites
Scoop out a little of the mixture and roll between your hands to shape into mini balls. I aim for about a tablespoon each; small enough for toddlers, but still satisfying for adults.
6. Chill for Firmness
Place the finished bites on a plate or tray in a single layer. Slide them into the fridge for about 30 minutes. This helps them hold their shape and makes them easier to pack up for your outing.
7. Pack and Store
Once chilled, pop the bites into a resealable container. Keep them in your cooler at the beach, and they’ll stay firm and ready to snack on for hours.
Easy Tips, Swaps, and Kid Friendly Ideas
- Swap the peanut butter for almond or sunflower seed butter if you have nut allergies in your group.
- For extra crunch, add a tablespoon of chia seeds, flaxseeds, or a small handful of chopped unsalted nuts.
- Mix in dried cranberries or chopped dried apricots along with (or instead of) raisins for a fruity twist.
- If you’re making these for toddlers, go with mini chocolate chips or finely chopped dried fruit to avoid choking hazards.
- Roll the balls in shredded coconut or crushed graham crackers after shaping for a little extra texture.
Frequently Asked Questions
Q: How long do these bites last in a cooler?
Kept in an airtight container, they’ll stay nice and chewy up to 4 days in your cooler. If they’re out in the sun too long, they might get a little soft, but they’ll still taste great.
Q: Can I use quick oats instead?
Quick oats work for a smoother texture, but the bites may be a bit less chewy compared to rolled oats. Either style does the job.
Q: What about peanut allergies?
Sunflower seed butter or soy nut butter are awesome stand ins for peanut butter. Always check labels to make sure there are no hidden allergens.
Q: Can I freeze them for later?
These freeze well! Just spread them on a tray to freeze, then toss into a zip top bag. Let thaw in your cooler or at room temperature before serving, and you’re set.
Make Snack Time Easy at the Beach
Having a batch of No Bake Beach Energy Bites packed up takes a load off my mind at the beach. There’s no worries about little ones needing a snack between swims or after a sandcastle building marathon. If you try them out, adding your own twist is easy, and they’ve been a hit every time I’ve shared them with friends.
Give them a try for your next beach outing; they might just become your new favorite portable snack. If you want to switch things up, try using a blend of seeds, a drizzle of maple syrup instead of honey, or your favorite kid friendly mix ins. Snack time can be stress free and tasty, and these bites prove it.
No Bake Beach Energy Bites Recipe
Ingredients
Equipment
Method
- Pour the rolled oats into a large mixing bowl.
- Optional: Pulse them a bit in a food processor if your kids prefer a less chunky texture.
- Measure out the peanut butter and honey
- Add both to the bowl
- Add in the vanilla extract or flavoring of choice
- Mix everything up with a spatula or big spoon
- Note: It may look a bit stiff at first, but keep going until it all comes together and the oats are well coated with the gooey mix
- Once the main mixture is sticky and uniform, fold in the raisins or chocolate chips
- Stir gently so they’re evenly spread throughout, but aren’t crushed
- Scoop out a little of the mixture with ice cream scoop
- Roll between your hands to shape into mini balls
- Place the finished bites on a plate or tray in a single layer
- Slide them into the fridge for about 30 minutes
- Once chilled, pop the bites into a food-safe, resealable storage container
- Keep them in your cooler at the beach, and they’ll stay firm and ready to snack on for hours
Notes
- Swap the peanut butter for almond or sunflower seed butter if you have nut allergies in your group.
- For extra crunch, add a tablespoon of chia seeds, flaxseeds, or a small handful of chopped unsalted nuts.
- Mix in dried cranberries or chopped dried apricots along with (or instead of) raisins for a fruity twist.
- If you’re making these for toddlers, go with mini chocolate chips or finely chopped dried fruit to avoid choking hazards.
- Roll the balls in shredded coconut or crushed graham crackers after shaping for a little extra texture.